Here is my Favorite Snow White in an inchie! It is 1x1 inch big. It's prettier in person, since it is so small. I found a scene of her cottage in the internet and I re-sized it to fit perfectly. I embellished the background with stickles. For Snow White, she was a stamp that I had found at a dollar store and I heat embossed it with black distress embossing powder so it shines. I colored her in with markers and a peach color prismacolor pencil. I used the Glitter pen jelly roll to do the sleeves, and red stickles to finish off the lips and bow and sleeves.
Monday, July 27, 2009
Snow White Inchie
Posted by ~*~Niki~*~ at 11:58 PM 4 comments
Tinkerbell Inchie
Here is a Tinkerbell inchie for a disney swap. It is a 1x1 inch piece of artwork that people share and trade and collect. I found a woods scene graphic and re-sized it to fit. Tinkerbell is a tiny stamp I had found at a dollar store. I colored her in with green and peach prismacolor pencils and green and diamond glitter stickles. I used peeled paint distress stickles for the background. 
Posted by ~*~Niki~*~ at 11:54 PM 0 comments
Donald Duck Inchie
Here is my Donald Duck inchie for a disney swap. An inchie is 1x1 inch piece of artwork that people collect and trade or use to embellish crafts. The background is a cartoon I found on the internet and I shrank it to fit. The sand is with Antique Linen distress stickles and Donald was from a stamp I had and I cut him out. I colored him in with prismacolor pencils and stickles and markers. 
I love how he looks like he is running around!
Posted by ~*~Niki~*~ at 11:51 PM 0 comments
Little Mermaid (Ariel) Inchie
This is for a disney inchie swap. An inchie is 1 x 1 inch of artwork. People trade and collect them.
I used green cardstock paper, and put a background stamp on it with rose coral ink. I highlighted it with the gelly glitter pen. I then stamped with aqua ink on white cardstock paper, and cut those out by hand for her background. Ariel was a tiny stamp I found a while ago at the dollar store. It is so tiny it was hard to get all the features, but I did my best.
Here is Ariel:
Her face was colored in with prismacolor peach, and the hair was colored in with marker and highlighted with the glitter jelly roll pen.
Thanks for looking!
Posted by ~*~Niki~*~ at 11:48 PM 0 comments
Hand Painted Wood Box
I painted this for a swap, and I'm so excited about it. It was hard to part with! She loved ladybugs and so I put my own spin on it. I painted in acrylics and it turned out amazing. Here are the pictures: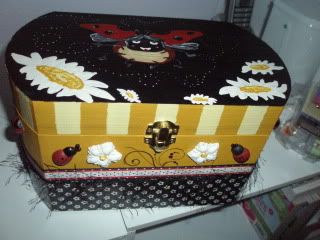
Front View of Box.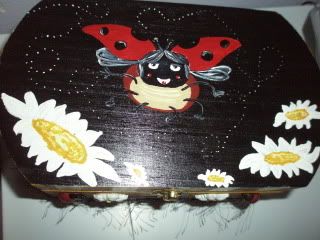
The scene on the lid.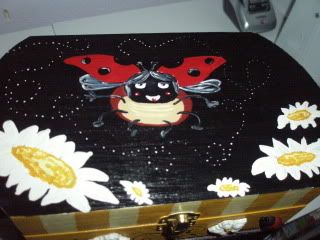
Another scene on the lid.
Closer View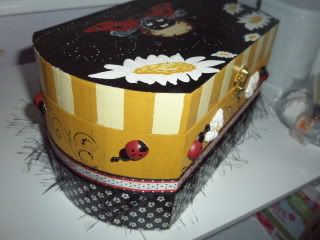
Side view!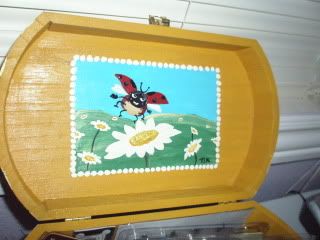
A surprise scene inside the box! 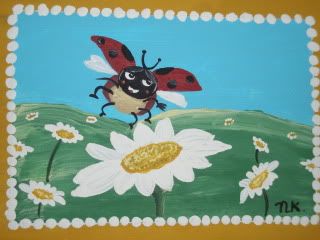
Close-up of the inside scene!
Posted by ~*~Niki~*~ at 11:41 PM 0 comments
Wednesday, July 22, 2009
Rock/Goth Altered Paint Can
Here is the front of the can. 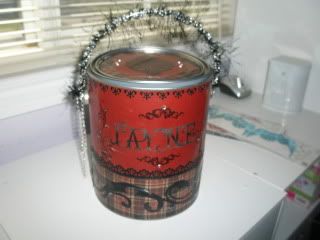
I used cricut design studio with storybook cart for the name. I used the EK success punch for the border. I sewed with the sewing machine for the trim, in metallic red. 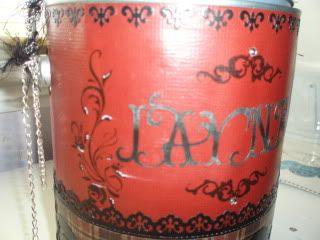
I used a stamp to embellish in stazon black ink. 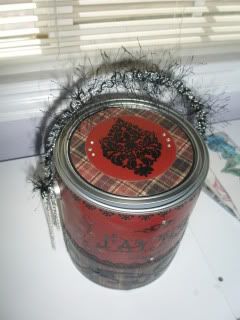
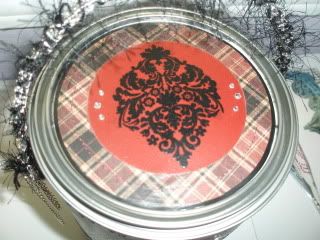
I had a great stamp for the top and I heat embossed with some distress black embossing powder. I sewed metallic thread for the border.
Here is the back: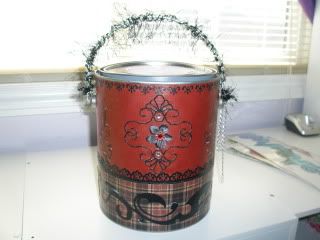
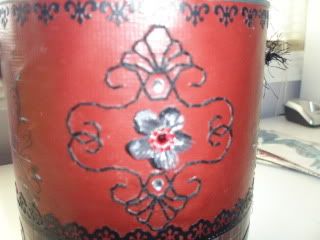
Here is a close-up of the hand stitch work I did for the motif. It's 2 corner parts, put together to make one big piece. I embellished the middle with a prima flower. For the bottom border, the black cut-out is a quickutz border die cut.
Here is the chain I used:
I think it rocked it! I wrapped it around the handle with black fuzzy yarn.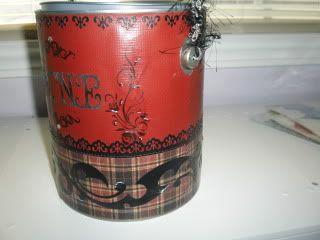
Thanks for looking, I'm very proud of this one!
Posted by ~*~Niki~*~ at 4:19 PM 3 comments
Saturday, July 18, 2009
Red ATC Card
Here is an Artist Trading Card from the same color swap. (ATC= 3 1/2 x 2 1/2) I chose red. I had a picture in my mind of what I wanted to do of red sunflowers and ladybugs. I decided to paint in acrylics! It was a challenge as we aren't supposed to use any other color. I had to mix whites with red, and black with dark red, so I can get the shading of things going okay. I really like the result! I sewed the trim on the bottom, and embellished with some red glitter paint on the leaves and inside the flower. I used red stickles and burgundy stickles to create the ladybugs. 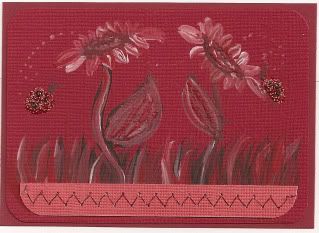
Posted by ~*~Niki~*~ at 8:32 AM 2 comments
Pink ATC Card
There was a challenge to make a color of your choice Artist Trading Card. (ATC= 3 1/2 x 2 1/2 inches) My color was pink. You can't use any other color. So you are supposed to make it with 3 shades of pink and use a technique of your choice. I used sewing. I had paper that had pink sewing on it and I sewed a frame around it. I used 2 colors of stickles to embellish the rose. I used sizzix sizzlets to make the rose and the fern leaf. I'm not sure if I like this, but, I guess it is okay.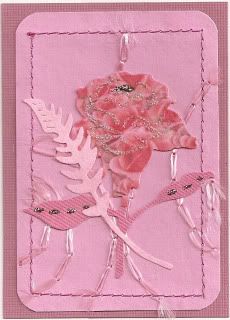
Posted by ~*~Niki~*~ at 8:28 AM 1 comments
Saturday, July 11, 2009
Copic Marker Blog Candy
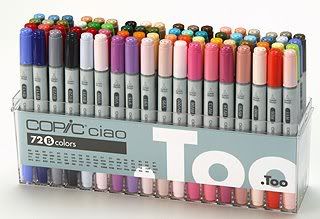
Here is a blog with a chance to win copic markers!
http://charmedcrafts.blogspot.com/2009/07/another-blog-candy-with-twist.html
Posted by ~*~Niki~*~ at 6:10 AM 1 comments
Sunday, July 5, 2009
A Poem I wrote
Here is part of a poem I wrote last week, felt very inspired. This is the second half:
He is the ALMIGHTY,
you are not,
So get off the throne,
that is HIS spot.
Take up the cross,
every day,
because He says,
or it's your loss.
May God bless you
and Keep you,
Be careful how you live,
He wants you to give
Mercy and grace
to others,
not at a slow pace,
put on a real face
as you have a mask
you hide with such task,
then you can, Be His Guest,
At His food-fest!
He can set you free,
from this disease,
Sorry is all you need,
forgiveness and mercy.
The gift is free.
Posted by ~*~Niki~*~ at 10:04 PM 0 comments
Thursday, July 2, 2009
Manatee Rescue ATC (Sea World Swap)
Here is another Artist Trading Card (ATC) I made for the Sea World Swap. It is 3 1/2 by 2 1/2 inches. I picked Manatee Rescue as the theme as it's my favorite! Here are all the supplies I used:
Light Green Cardstock
Dark Blue Cardstock
Black Cardstock
Water Print Paper
3 Colors of Glimmer Mist
Pearl, Sea Glass, And another blue one, I forgot what color
Silver, Aqua, Blue, Cats Eye ink
Cricut Seaweed from: Life's A Beach
Glitter Jelly Pen
Silver Ice Stickles
Zig Pen glue adhesive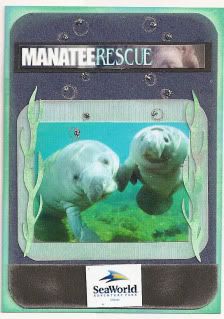
I sprayed the blue cardstock with 3 colors of glimmer mist and let it dry. The light green cardstock, I shaded with 2 colors of catseye ink, to seem like water.
I printed out the title from a picture and added the font on glossy paper. Sea World logo from the internet also on glossy paper. I found the manatee picture on the internet, because they looked cute and happy. I used silver ink to shade the seaweed, the edge of the blue cardstock and on the base. I used the Jelly Glitter pen to make the bubbles and highlighted it with ice stickles
Posted by ~*~Niki~*~ at 9:52 AM 1 comments
Monday, June 22, 2009
Sea World Vacation ATC Card "Seahorse Aquarium"
Here is my Artist Trading Card (ATC) for the Sea World Vacation swap. I had fun with this one, using sea glass glimmer mist for the background, punches for the seahorses, and the cricut for the seaweed. I also had a neat stamp from The Angel Company, for the background seaweed. 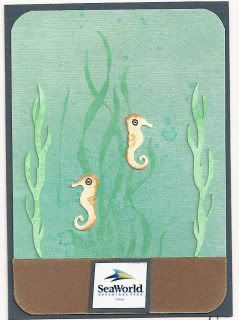
Posted by ~*~Niki~*~ at 1:44 PM 3 comments
Vegas ATC "It's Vegas, Baby!"
Here is my Artist Trading Card (ATC) for the Vegas Swap. It is 3 1/2 inches by 2 1/2. We were supposed to use a lot of BLING, and I think I did that good! I used 8 colors! I was inspired by the Vegas lights, and the showgirl. I wanted one that was old-fashioned and classy looking. I also like the slogan "It's Vegas, Baby!" so that is it's name!
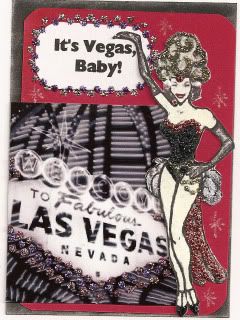
Also, when I was waiting for the glitter to dry on the cards, I lined up the girls, and here is a picture of the line-up: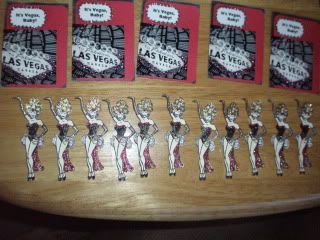
Posted by ~*~Niki~*~ at 1:39 PM 5 comments
Dance Recital June, 2009
Finally the long-awaited pictures for the Dance Recital!
Here is Melody's Costume: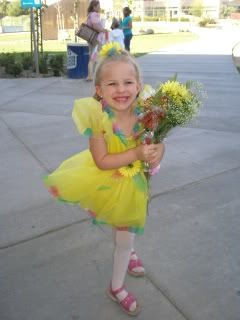
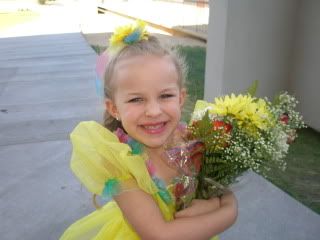
Melody did a Tap Dance number, and then a Ballet Dance number:
This is from the Dress rehearsal since you are not allowed to take pictures on the actual performance.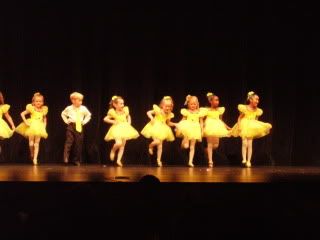
(Melody is 4th from the right above)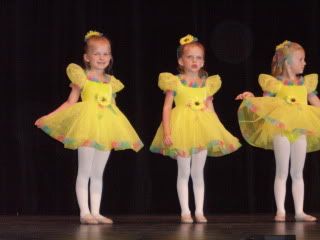
(Melody is on the left)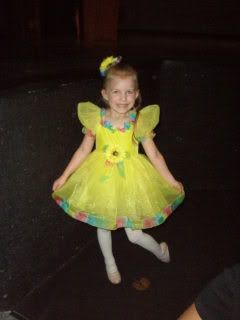
(above) this picture was taken at the dress rehearsal.
Here is Amanda before she was go to on, it was at the dress rehearsal. She thought it was cool to have her own mirror.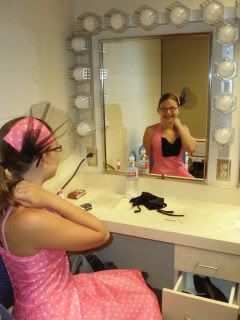
Below: Here is the dance with my husband and daughter at the dress rehearsal. They are in the center.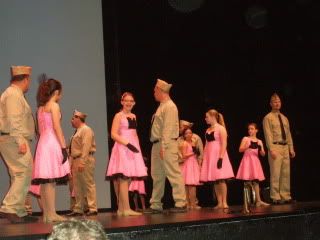
After the Performance: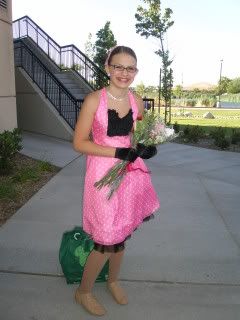
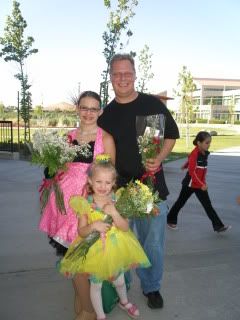
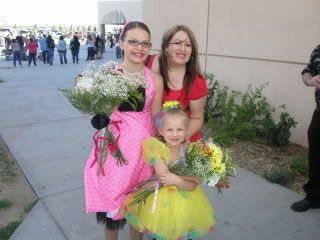
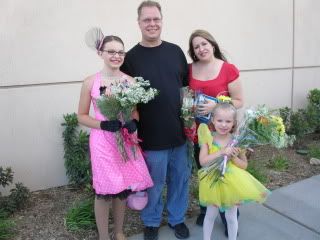
It was a blessed time and weekend! Thank you for looking!
Posted by ~*~Niki~*~ at 1:30 PM 3 comments
Wednesday, June 17, 2009
Father/Daughter Dance
Here are a couple of pictures of my husband Ed, and our older Daughter Amanda. The dance recital is this weekend, we are all so excited! Our younger Daughter Melody is dancing in it as well for her Tap and Ballet. They have worked so hard, so it will be amazing to see them this weekend! Here are two pictures of the Father/Daughter Dance costumes. It will be a Swing Dance to: Boogie Woogie Bugle Boy. Will have more pictures later of the other costumes! 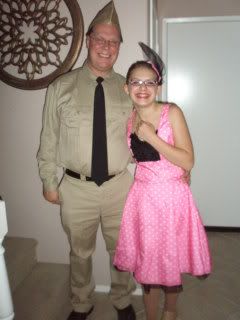
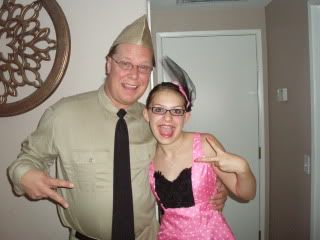
Psalm 28:7 The LORD is my strength and my shield; my heart trusts in him, and I am helped. My heart leaps for joy and I will give thanks to him in song.
Posted by ~*~Niki~*~ at 11:48 PM 2 comments
1920's ATC Card
I think this is my favorite Artist Trading Card as of yet! I really had fun with this Decade. Many events and things happened around that time so I tried to capture what I could to reflect it. The Card is 3 1/2 x 2 1/2 inches.
I used:
2 images I found on the internet and printed them out on glossy paper.
I went to wordle.com and made a word collage for this. It ended up not working out the way I wanted it to, but I like this one much more. So I cut them out and placed them.
Liquid Pearls in White. (For her jewelry)
I used Burgundy and Christmas Red stickles.
Silver, and Warm Red catseye ink for shading.
Zig Pen Glue
Cream, White, and Burgundy cardstock. 
Posted by ~*~Niki~*~ at 11:41 PM 2 comments
"This Is The Life" Beach Theme ATC Card
Here is another Artist Trading Card! It is 3 1/2 by 2 1/2 inches big. This is made with an Inkadinkado Stamp and StazOn Jet Black ink. I colored it in with my prismacolor pencils and used green stickles and yellow stickles. I used Navy cardstock for the background. It just makes me think of a relaxing day by the beach, reading a book! Love it! 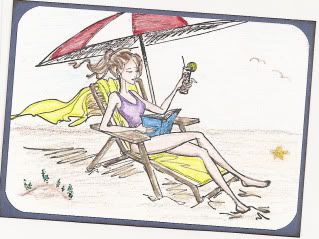
Posted by ~*~Niki~*~ at 11:33 PM 1 comments
Thursday, June 11, 2009
Snow White ATC Card
I'm making these ATC cards for a swap I'm in, this one is for the disney vacation swap. ATC cards are 3 1/2 by 2 1/2 size. I really liked making this one, it was great fun! ATC= Artist Trading Card
Here is what I used:
Snow white in size 1 3/4 inch on the cricut
water colors
water color paper for the background
stickles in 4 colors
flower brads in 3 colors
Navy Paper
Apple punch
White pen for highlight on apple.
Maroon ink for shading apple.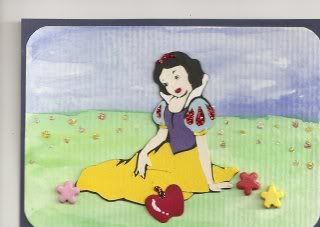
Posted by ~*~Niki~*~ at 8:54 AM 4 comments
Uninvited Guests ATC
This card was made for a swap I'm doing. It's summer theme and in misc. So I thought this card would be funny.
Here is what I used:
Blue, white, yellow cardstock
Various food studio g stamps
Prismacolor pencils
Black and yellow stickles
Glue zig pen
Background plaid stamp
Red glitter embossing powder for heat emboss
Black, red and green zig pens.
Blue Catseye ink for edges of blue paper.
So I cut out the card in yellow 3 1/2 by 2 1/2.
I heat embossed the plaid background with the red glitter powder for the tablecloth. I stamped and cut out each food item, colored them and glued them on. I drew the ants myself. 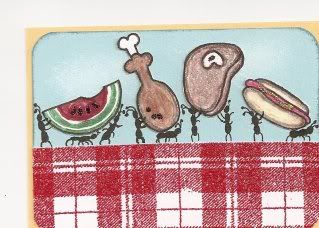
Thanks for looking!
Posted by ~*~Niki~*~ at 8:46 AM 2 comments
Tuesday, June 9, 2009
Thank you for the Award!
I GOT AN AWARD!!!!
Hey cool I got an award from: ~Crafty J's Place~ Thanks Jeri! Sorry it took me so long, okay I hope I'm doing this right. I'm so honored :-)
1: Thank the person who gave me the award and link to their blog (completed)
2: List 10 honest things about myself:
1. I love the Lord very much.
2. I'm blessed to have a wonderful and loving husband that is always on my side, he is my best friend.
3. My favorite scripture is: 1 Corinthians 2: 9 However, as it is written:
"No eye has seen,
no ear has heard,
no mind has conceived
what God has prepared for those who love him
It was preached the day I came to know the Lord, and it really opened my eyes.
4. My 2 daughters are so amazing, I enjoy spending time with them. I learn so much from them and we love to laugh together.
5. I'm blessed to have amazing friends
6. I like to do all kinds of art, I like the challenge of learning new things. It's so much fun to do.
7. I'm a deep thinker, I think about everything and pray about everything.
8. I love going to Disneyland!
9. I love to dig deep into God's word and study and I love to learn.
10. I miss my niece and nephews too much.
3:Put the award on my blog(Completed)
4:Pick 7 people to give the award to:
In no particular order.....
A Heart To Homeschool
Black Diamonds
Little Did She Know
Liz's Craft World
Scrap This, Craft That
Pixie Dust Creations
Lisa Loves Stampin And Craftin
Posted by ~*~Niki~*~ at 10:08 AM 2 comments
Tuesday, June 2, 2009
"Pooh Jumps For Joy" Inchie
Here is an inchie I made for my Daughter's Disney swap on the cricut board. I used 3 layers of cardstock, and found a neat watercolor picture to put in the background. I used copper glimmer mist over the pooh color paper. I colored his shirt with a marker. You can see the sparkle through the red of his shirt. He is from a punch my daughter had. I used red glitz stickles for the dots on the frame. Inchie: 1 inch work of art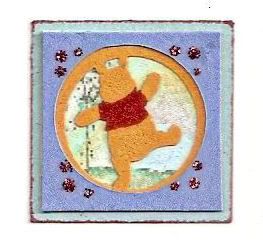
She is really excited about this swap, thanks Jeri for your help with the swap!! You're awesome!
Posted by ~*~Niki~*~ at 7:29 PM 2 comments
Sunday, May 24, 2009
Refiner's Fire
Been thinking about quite a bit lately of the process of fire and how they refine silver. It goes through a huge process, to take out impurities. We all have impurities! I know I do! Sometimes we go through trials and things so God can produce our Character, to become who He meant for us to be.
Malachi 3: 2 “ But who can endure the day of His coming?
And who can stand when He appears?
For He is like a refiner’s fire
And like launderers’ soap.
3 He will sit as a refiner and a purifier of silver;
He will purify the sons of Levi,
And purge them as gold and silver,
That they may offer to the LORD
An offering in righteousness.
4 “ Then the offering of Judah and Jerusalem
Will be pleasant to the LORD,
As in the days of old,
As in former years.
Have you ever thought of the process it takes to purify silver? It's quite interesting. Here is a story I found on the internet:
Refining Silver
Some time ago, a few ladies met in a certain city to read the scriptures, and make them the subject of conversation. While reading the third chapter of Malachi they came upon a remarkable expression in the third verse: "And He shall sit as a refiner and purifier of silver." One lady's opinion was that is was intended to convey the view of the sanctifying influence of the grace of Christ. Then she proposed to visit a silversmith and report to them what he said on the subject.
She went accordingly and without telling the object of her errand, begged to know the process of refining silver, which he fully described to her. "But Sir" she said, "do you sit while the work of refining is going on?" "Oh, yes, madam," replied the silversmith; "I must sit with my eye steadily fixed on the furnace, for if the time necessary for refining be exceeded in the slightest degree, the silver will be injured."
The lady at once saw the beauty, and comfort too, of the expression, "He shall sit as a refiner and purifier of silver." Christ sees it needful to put His children into a furnace; His eye is steadily intent on the work of purifying, and His wisdom and love are both engaged in the best manner for them. Their trials do not come at random; "the very hairs of your head are all numbered."
As the lady was leaving the shop, the silversmith called her back, and said he had forgotten to mention that the only way that he knows when the process of purifying is complete when he sees his own image reflected in the silver....
--Author Unknown
So, I lay in bed last night, just praying that He can see Himself in me, like a mirror. I want to be the Moon, because it reflects the Sun!
~Niki
Posted by ~*~Niki~*~ at 1:05 PM 2 comments
Saturday, May 23, 2009
Decade: 1910's ATC
Here is my very first ATC card! I'm so proud of it! I have never made these before but always wanted to. An ATC is an Artist Trading Card, of original art that people trade, sell, ect. The card is size 3 1/2 inch by 2 1/2 inch. You are supposed to layer the paper and sign the back. I'm involved with many swaps, and one of them is that everyone is doing decades. My Decade is the 1910's. This card is so pretty. 
The card itself is white textured Bazzill paper. The background is a black cardstock. I found a print of a lady from 1910, I liked her hat and her smile. I printed it out on cardstock and tore the edges. Feathers were really big back then, so I accented with some fibers to resemble feathers. The Zipper was invented and became very popular in this decade so the trim on the top/bottom is part of a stamp by Fiskars, which I accented with silver Stickles. I found a newspaper article about the Titanic sinking and printed that out on cardstock and distressed it. The clock stamp I heat embossed using Ranger black fine detail embossing powder. I really love this result. I'm so excited, this card was so neat to make!
Posted by ~*~Niki~*~ at 7:21 PM 4 comments
Wednesday, May 20, 2009
My Big Battle
Well, weight loss is a funny thing! I have been trying to lose weight since January, and it goes up and down and up again, then down in a huge way. The weight still wants to cling to you, and I gotta kick it's butt off every single week! It's like a huge battle, and I want to win! I have lost about 21 pounds so far, and it's been quite fun to see the results, smaller pants, smaller shirts, nothing I had will fit anymore, it's quite crazy. I keep thinking, "More of Jesus and Less of ME" Literally. So that is what I really want in my life, More of Jesus! With His help, this weight battle will be won! He really has helped me! So every week that goes by, I have to really catch myself, making sure I eat enough calories, not the wrong things. At least I don't drink soda anymore, and the cravings for it have weakened, whew, what a relief! I usually keep a tally of how much I exercise every week, so now I have placed that tally on here. Anyhow, I just wanted to share what I have been going through. It's a BIG BATTLE and I wanna win it! These are just my random thoughts! :-)
Posted by ~*~Niki~*~ at 3:11 PM 4 comments
Tuesday, May 12, 2009
Inchies, Twinchies and Trinchies Set!
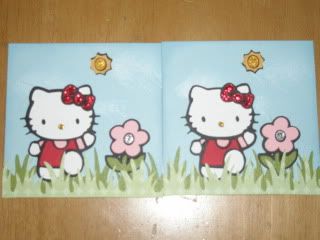
Here is a new project I just made. It's for a swap and these, they turned out so cute I'm going to have a hard time parting with them! Inchies are a new craze, they are little pieces of art, that fit on a 1 inche square. But this swap went a bit further, and wanted me to make a matching set of a 2 inch as well as a 3 inch square! Here is what I came up with.
I cut them on my cricut, using Zooballoo cricut cartridge, I cut 3 sizes of grass in 2 colors. Then I played with my cricut Hello Kitty and friends, and cut out the suns, and the Hello Kitty's and the flowers, OHH so cute! I shaded some clouds in the sky, with my catseye ink in white: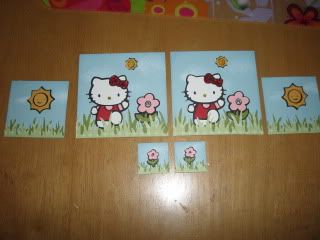
Posted by ~*~Niki~*~ at 7:22 PM 5 comments
CD and Cereal Box Book!
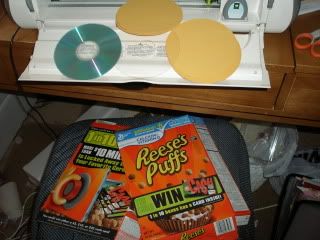
What can you do with old CD's and a cereal box??!!! I'm in this swap, and I'm new to altering things, and one of the things to do in this swap is to make something altered. I kept thinking about it and thinking about it until finally, I thought I would make a small book!
Materials:
Cricut Expression
Cereal Box
2 CD's
Bind It All
4 Sheets of 12x12 paper solid color
1 sheet of Print Paper
1 Brad
2 Flowers
Ribbon
Sponge Paintbrush
Stickles glue
Mod Podge
Cricut-"George" Cartridge using Circles
_______________________________________
I measured the CD's so I can cut paper on the Expression at 4 3/4 inches. I cut out all the circles of solid paper. I took apart the cereal box so the box will lay flat on the sticky mat. 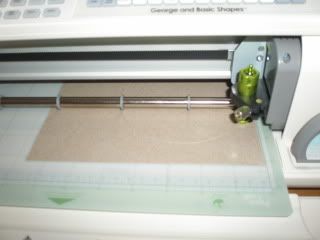
I cut out four circles also at 4 3/4 inches on the expression. I had it set at the highest pressure and it cut out perfectly. I didn't need to change to the deep housing blade. 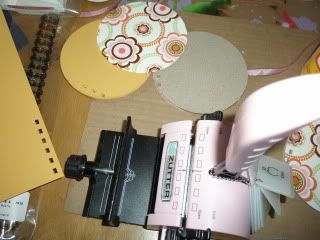
When I cut everything out, that was when I used my Bind it all to cut all the sides of the paper and CD's and cardboard, so when I glue it, it will come together perfectly.
I glued the cardboard on both sides of both CD's using Mod Podge. I glued the ribbon on the CD at that point so I will be able to tie it together to keep the book shut. 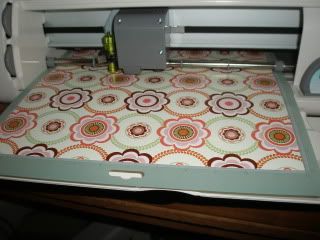
This is the print, I used it for the covers outside and inside, on either side of the cereal box. 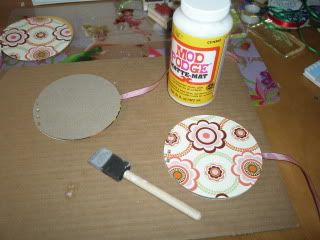
I glued with Mod Podge the print onto the cardboard. I kept out the cover and embellished the front with flowers and a brad. 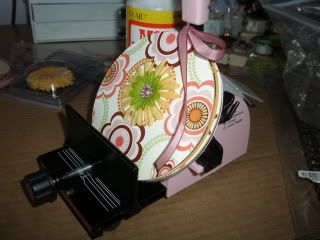
Then I binded it together!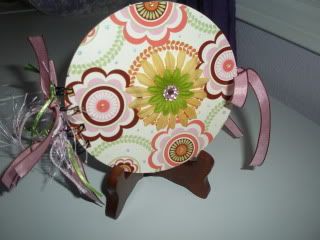
Here it is!!! All done! Just put ribbon on the edge! It was great fun to make!
Posted by ~*~Niki~*~ at 7:01 PM 3 comments

